No products in the cart.
Install SSL Certificate
How to Install Entrust SSL Certificate?
Part 1 of 3: Importing CA certificate using Microsoft Management Console (MMC)
1. Click the Download button in the pickup wizard to download your certificate files. Clicking the download button will produce a zip file that includes your Server Certificate, the Entrust chain/intermediate certificates(s) and the Entrust Root certificate. Extract the files from the zip file.
2. On the server, go to Start > Run > type MMC and hit enter.
3. Click File > Add Remove Snap-in.
4. Select Certificates and click Add.
5. Select Computer Account, click Next,and click Finish.
6. Click OK to close the window.
7. Expand Certificates on the left hand side of the console window.
8. Expand the Trusted Root Certification Authorities folder and click on the Certificates sub-folder.
9. Right click on the Certificates sub-folder under Trusted Root Certification Authorities and select All Tasks > Import.
10. In the import wizard, browse to the Root.crt file downloaded in step 1 and complete the wizard.
11. In the MMC console, expand the Intermediate Certification Authorities folder. Right click on the Certificates sub-folder and select All Tasks > Import.
12. In the import wizard, browse to the Intermediate.crt file downloaded in step 1 and complete the wizard.
13. Right click on the Certificates sub-folder under Intermediate Certification Authorities and select All Tasks > Import.
14. You should see your Entrust Intermediate certificates listed in the Intermediate Certification Authorities folder. You are now ready to install your signed server certificate.
Part 2 of 3: Installing the certificate on the server
1. Launch the Internet Information Services Manager (IIS) by going to Start > Programs > Administrative Tools > Internet Information Services (IIS) Manager.
2. Select the server name in question on the left hand connections menu.
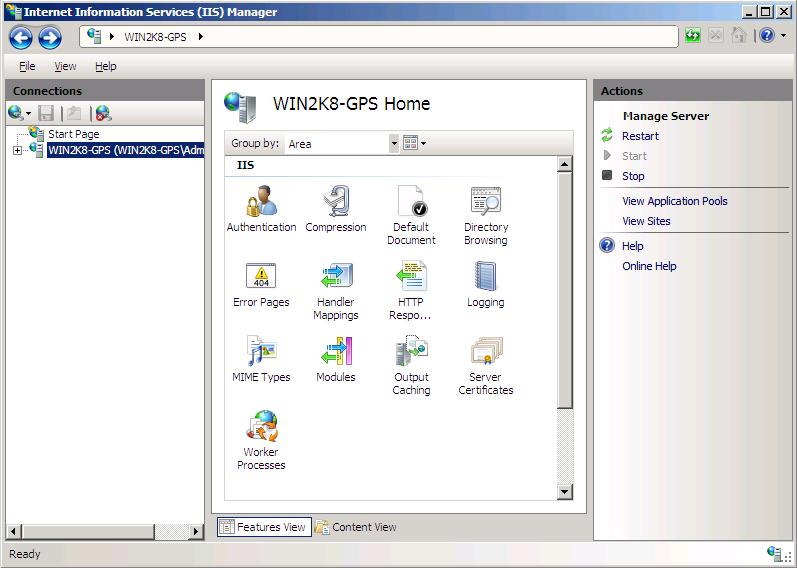
3. In the middle section of the IIS Manager, double click on the Server Certificate icon.
4. Click on the Complete Certificate Request action link.

5. Browse to the ServerCertificate.crt file that was downloaded in step 1. Provide a friendly name for the certificate. The friendly name can be anything – it is just a label for your certificate.
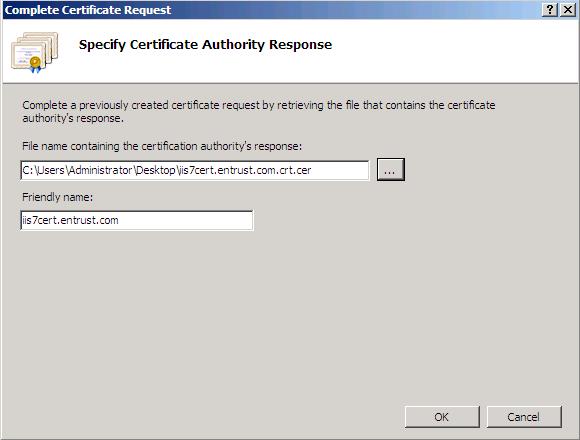
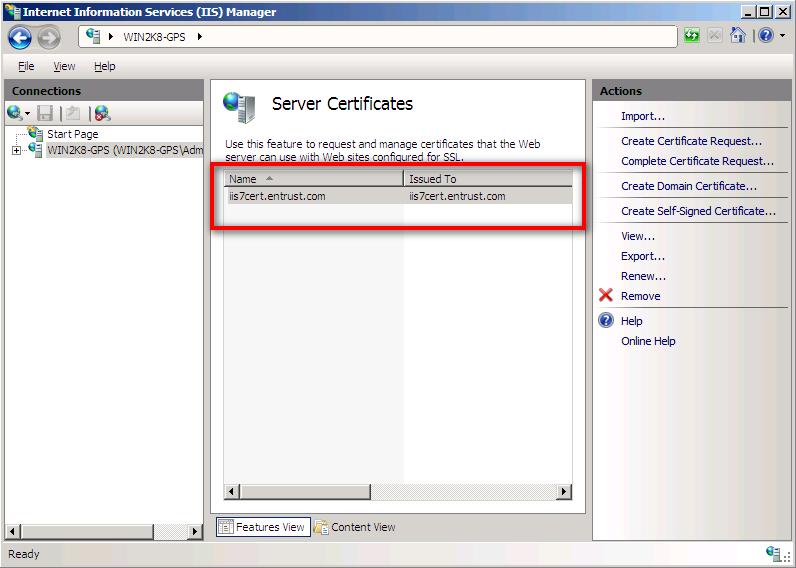
6. Click OK to complete the import process. Your certificate should now be displayed in the Server Certificate list.
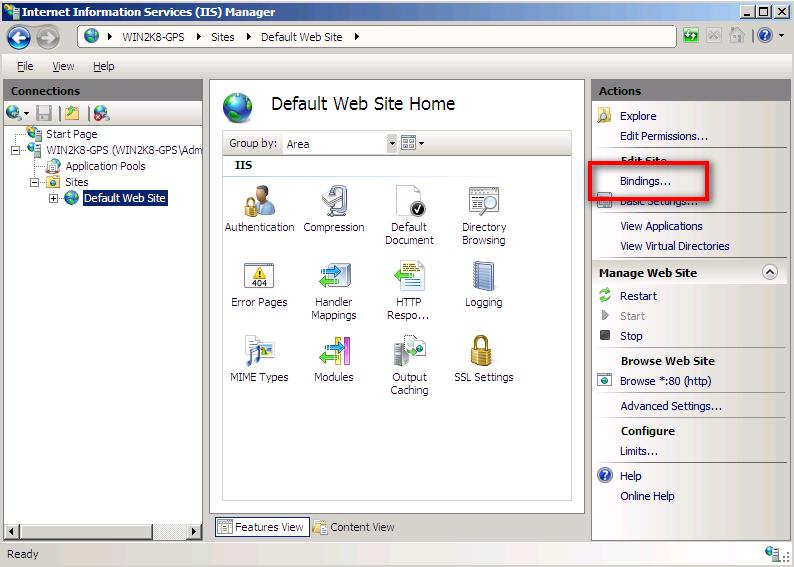
Part 3 of 3: Bind certificate to website
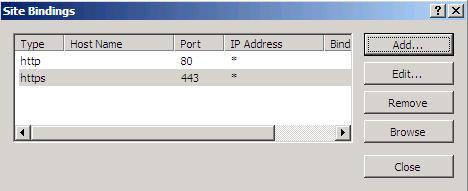
1. Now that the certificate is imported, you must bind your certificate to the website. In IIS, select your website (in most cases, Default Web Site) under the connections menu and click on Bindings under the Action menu.
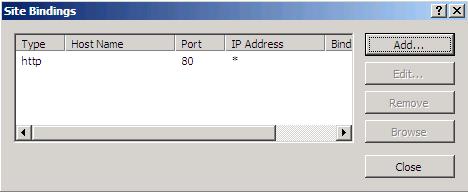
2. Select Add from the Site Binding window. If you are renewing or replacing a certificate, you should already see https listed under type. In this case, select edit to update the certificate for that binding.
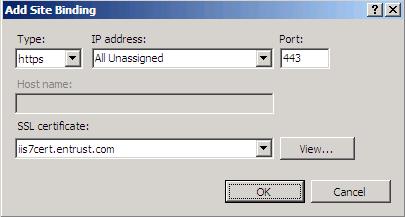
3. In the Add Site Binding window, set the Type to https, IP address to All Unassigned, and Port to 443. Select the Server Certificate that you imported previous in the SSL Certificate dropdown. Click OK to complete the bindings setup.
4. You should see an https binding in the Site Bindings window.