No products in the cart.
Install SSL Certificate
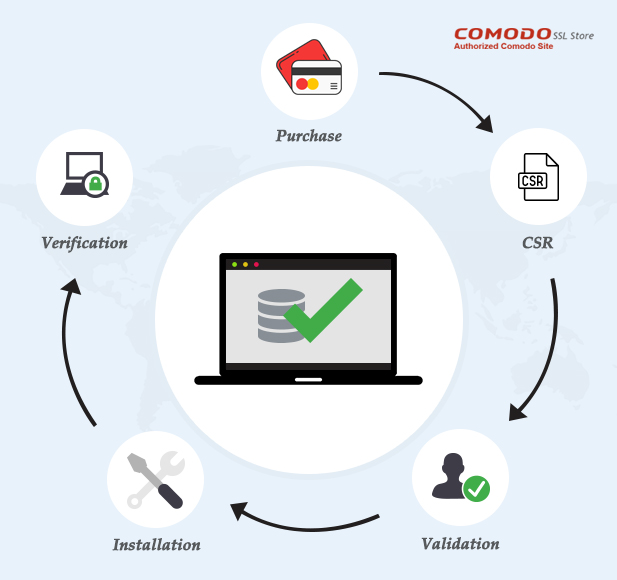
How to Install Comodo SSL Certificate?
Steps to Install Comodo SSL Certificate :
Step 1: Making the Purchase
The first step in the process to get HTTPS enabled on the website involves placing the order. First, you need to log in with your credentials or in case if you don’t have an account, register yourself with your true credentials. After that, select the SSL certificate that you want your website to be shielded by and add it to the cart. Finally, place the order.
Step 2: Generating the Certificate Signing Request (CSR)
Before issuing the SSL certificate, the certificate authority (CA) needs the users to submit a request, known as certificate signing request (CSR). The CA asks the user to generate and submit CSR in order to validate the authenticity of the user and his/her organization. The buyer needs to submit his/her domain details while submitting the CSR.
Step 3: Validation Process
Validation and encryption are the two primary purposes of an SSL certificate. Before the issuance of an SSL certificate, the certificate authority (CA) needs to verify the details of the domain owner as well as his/her organization. The verification process depends on the type of certificate one wants as well as on the certificate authority (CA). This is the most crucial step from the CA’s point of view.
Step 4: Installing the Certificate
Once the SSL certificate is issued, the user needs to get this certificate get enabled on the web server. One needs to install two other certificates along with the main SSL certificate. These two certificates consist of an intermediate certificate and a root certificate. The installation process differs from one server to another. On our site, you can find the detailed installation guide to install SSL certificate on various web servers.
Step 5: Verifying SSL Installation
Having installed the SSL certificate on the web server, the ultimate step is to validate whether your website has been migrated to HTTPS or not. Using our SSL Checker tool, you can make sure if the SSL certificate has been installed rightly.